
Replacing a Starting Cord in the Honda 2000i Generator - S/V Freedom - a Gemini 105 - Jim and Deb Faughn
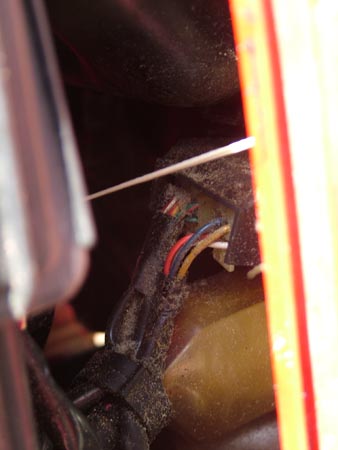
The pull cord on our Honda Generator all but broke this morning. There was only a tiny bit of the cord holding it all together which you can see in the picture to the right. All truth told, our generator has done and amazing job. So this project is all about replacing the starter cord on the Honda 2000i Generator. First you have to remove the screws on the side of the cover on the end where you plug the 110 into the generator. There are two screws on the side high up. Then remove the two screws on then end at the bottom. If you are like me and actually use it all the time, the screws may be rusty. I used a good screwdriver and placed it on the head of the screw aligning it carefully then hit it several times with a hammer before trying to unscrew the screws. This did two things. First it cleaned up the points of the screw and second, it broke the rust up a bit on the threads. After these four screws are out, unscrew the two screws in the handle. Then remove the side cover where you change the oil. Now you should be able to reach in and remove the three electrical connectors you see to the right. The two on the top are locked in place with a piece on the top of the connector. Pull up the black rubber and you can see that lock. Press down on it and slide the connectors out. The next cord is the one below that covered with a cover. You have to pull the cover back and the locking unit is on the side. You may struggle with this but using a big screwdriver and perseverance, you will get it off. Now you can pull the end cover with the inverter off the end of the generator giving you access to the fuel tank. |
 |
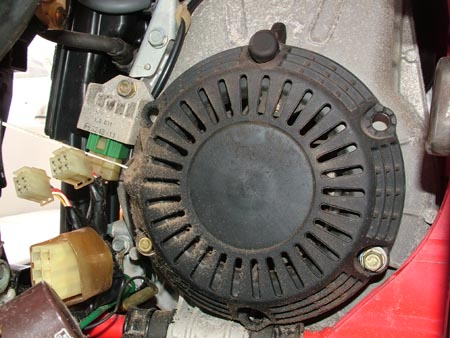 |
By pulling on the steel frame members you can separate the side from the two tabs, near the bottom, of the gas tank which holds the gas tank up. You must pull that gas tank out and support it to get access to the pull start assembly you see to the left. There are 3 bolts holding it in place. Two you can see and the other one is on top under the cover. This last one is hidden by the gas tank until you pull it out. You can also see the three plugs you removed in this picture. Everything is tight but it is obviously well engineered and would be easier if you don't have rusted bolts. But then if you don't have rusted bolts you probably haven't been using the generator and won't break the pull cord. Next it is straight forward. Use pull the pull start assembly out the end and pull the cord all the way out if it hasn't completely broken. This presets the spring coil and you can use a small screwdriver through the slots to hold the spring in place until you run your new cord. If it did break, you will simply have to tighten up the spring and then put in the screwdriver. |
Next, pull out the old cord and cut your new one to the length of the old one plus a couple of inches to allow for the knots on the end. At this point, you must remember to run the cord through the side of the generator in the appropriate hole before tying an end to the pull handle and the other end inside the assembly. Finally, put everything back together and you are set. Pretty easy really but I was not able to find this procedure anywhere on the internet before I started. It may be out there but I couldn't find it. So this write-up will also go in my projects page just so it is there now and I don't forget what I did next time we need to do this again. By the way, while you are inside, you can clean it up a bit and lubricate all the nut plates you can access so it will perhaps be easier next time. |
|
Web Page by Jim Faughn